Removing Unwanted Objects
There are times when we want to take a photograph it is beyond our power to get to an angle where we can get a clean shot, for instance a rubbish bin in the way, or a cable crawling down a wall.
Thanks to post processing we can rectify this problem. For this article, I will be using Photoshop, but similar routes can be taken in other editing applications.
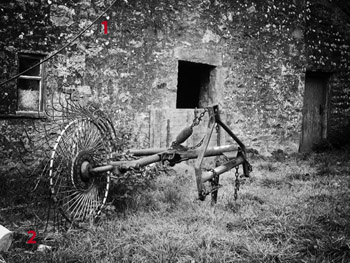 Take a look at the image to the left – I have marked out two major eyesores that need to be removed.
Now, as always in Photoshop, there is more than one way to do things, but here I am going to use the Clone Tool on its own.
Before We Begin
One of the great advantages of the Clone Tool is that you can clone directly onto a new blank layer. This is great if you make a mistake, since you can just erase the area that hasn’t worked. If you were to clone on the same layer you would possibly have to start the project from scratch!
Ok, first of all, create a new Layer and call it CLONING.
Now press the ‘S’ key or select the Clone Tool from the Tool Box. Check your settings so that they look like the ones pictured here:
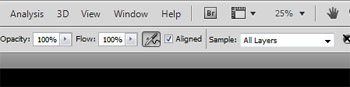 NOTE: Make sure the ‘SAMPLE ALL LAYERS’ option is highlighted.
Select a brush size that is a little bigger than the cable and zoom in enough for you to work with. Look for an area close by that Press and hold the ALT key and click your Left Mouse Button to set the source. Now you can clone over the wire area.
NOTE: It is a good idea to select different source areas when you clone, otherwise you will end up with repeating patterns.
The window frame area can be a little more tricky to remove the cable, but by pressing the CAPS LOCK key, your cursor will turn from a brush into a cross hair – this is called ‘Precision Mode’, and allows you to clone areas which need to be lined up nicely.
Reduce your brush size and then press the CAPS LOCK key. Set the source by holding down the ALT key and clicking the left mouse button just below the cable, using the window frame as your target. Once set, carefully clone out the pipe, then repeat on the other side of the frame.
Press the CAPS LOCK key to turn off ‘Precision Mode’ so your brush icon appears again, adjust the size, and clone out the remaining pipe that is covering the glass – remember to reset your Clone Source to avoid repetition patterns.
Now all we need to do is sort out the bottom left hand corner, where the bucket is visible. Make a good sized selection around the bottom left hand corner, then FEATHER is by 1 PIXEL. Grab your CLONE TOOL once again and set the source. I set mine somewhere in the middle bottom of the image. Start cloning inside the selection. Notice how, if you go outside the selection, it will not clone anything!
To see your handy work, make the image fit on the screen, and turn the CLONING LAYER on and off.
Hope this article was of some help to you J